How to Make a Paper Mache Piñata in 8 Easy Steps
Last Updated on May 23, 2023 by Project Party
If you’re looking for a fun, unique, and really messy project to work on with the kids (or by yourself—we don’t judge!), look no further than this step-by-step guide on how to make a paper mache piñata at home. Not only is this activity guaranteed to be a blast, but you’ll also end up with a one-of-a-kind party decoration that’s sure to be a hit at any celebration.
Discover the Fascinating History of Piñatas and How to Make Your Own Paper Mache Piñata!
Did you know that piñata:
- originated in Asia, and were first used as a way to scare away evil spirits
- were originally made from clay pots, and were filled with seeds and fruits
- can be made from a variety of materials, including paper mache, cardboard, and even cloth
- the most popular shape is a star, but other popular shapes include animals, hearts, and moons
- are often decorated with colourful paper streamers, ribbons, and tissue paper, and
- are traditionally broken using a stick or bat.
So there you have it, some quick fun facts about piñatas! While, piñatas can be made of almost any material – from cardboard to fabric – but the most popular and traditional type is still made from paper mache. Let’s get started on creating your own!

Get Ready to Party: How to Make a Paper Mache Piñata – Step-by-Step Guide and Supply List
So what are you waiting for? Gather up the supplies listed below and let’s get started! To make your own paper mache piñata, you’ll need the following supplies:
- a balloon
- strips of newspaper
- flour
- water
- a bowl or bucket for mixing
- scissors
- crepe paper or tissue paper in assorted colours
- a stapler
- string, and
- candy or small toys for filling your piñata.
1. How to Make a Piñata: Inflating Your Balloon
Inflating the balloon is the first and most crucial step in making a piñata. The size of your balloon will determine the final size of your piñata, so choose carefully. You can opt for a small-sized one for a mini piñata or a large one that can hold a lot of candy and surprises.
Make sure to hold the neck of the balloon tightly while blowing air into it with your mouth or a pump. You’ll know you’ve inflated the balloon enough when it’s firm and has no soft spots. Avoid overinflating the balloon as it may burst, resulting in a messy situation.
Once you have the desired size, tie off the end securely using a knot or twist tie. Ensure that the balloon is tied tight enough to prevent air from escaping. Before moving on to the next step, take a moment to examine the balloon and make sure it’s evenly shaped without any lumps or bumps.
2. Mix Your Paste
The next crucial step in making your paper mache piñata is creating a sticky paste that will hold everything together. To do this, you’ll need a bowl or bucket and equal parts flour and water. The amount of paste you need will depend on the size of your piñata, so adjust accordingly.
Begin by measuring out equal parts of flour and water, such as one cup of flour and one cup of water. Pour the flour into your bowl or bucket, and gradually add the water while stirring continuously. Keep adding water and stirring until you achieve a smooth, thick consistency that sticks to the balloon or newspaper strips without slipping off.
It’s vital to maintain a 1:1 ratio of flour to water, as too little flour will make the paste too runny, while too much flour will make it too thick and hard to work with.
3. Preparing Your Paper Mache Strips
The next step in creating your own piñata is preparing the paper mache strips. To start, cut your newspaper into manageable pieces that are not too big or too small. You can use scissors to do this, but tearing them by hand can create a more rustic look.
Once you’ve cut your newspaper strips, it’s time to dip each one into your paste. Make sure each strip is fully coated with the paste before laying it down on your balloon surface. This will help the strip adhere to the balloon and form a sturdy base for your piñata.
Repeat this process until the entire surface of your inflated balloon is covered in a thick layer of paper mache. Make sure you cover every inch of the balloon evenly, leaving no gaps or spaces uncovered. The more layers of paper mache you add, the stronger and sturdier your piñata base will be. After you’ve finished applying all of the paper mache strips, allow the base to dry completely. This can take several hours or even overnight, so be patient. Once the base is fully dry, you’re ready to move on to the next step in the piñata-making process!
4. Opening Your Piñata
The next step in creating your own piñata is opening it to fill it with candy and surprises. After adding the final layer of paper mache to your piñata, allow it to dry completely. The drying process can take anywhere from 24 to 48 hours, depending on the size and thickness of your piñata.
Once you’re sure that your piñata is fully dry, it’s time to cut a small door into the side of the balloon. Using a pair of scissors, carefully cut a small rectangular or oval-shaped door into the surface of the piñata. Be cautious not to cut too deep, as you don’t want to damage the structure of your piñata.
Ensure that the door is large enough to fit your candy or toys, but not so big that it weakens the structure of your piñata. A good rule of thumb is to keep the door no more significant than one-third of the total surface area of the piñata. This will ensure that the piñata remains sturdy and strong and doesn’t fall apart too quickly.
Congratulations! You have now opened your piñata and are ready to fill it up with all sorts of goodies and surprises.
5. How to Make a Paper Mache Piñata Your Own: Decorate It
The final step in creating your very own piñata is decorating it with bright and colourful crepe paper or tissue paper. This is where you get to let your creativity run wild and make your piñata unique and eye-catching.
Start by choosing your colour scheme and deciding on the design you want to create. The possibilities are endless! Whether you want to make a palm tree for a tropical-themed party or a pumpkin for Halloween, the sky’s the limit. Use markers or paint to add extra details such as faces, spots or stripes to make it even more attractive.
When it comes to pinatas, there are two schools of thought: those who believe that any colour scheme is acceptable, and those who believe that bright colours are a must. While we respect the former opinion, we must disagree when it comes to the latter. Bright colours are essential for creating a visually appealing pinata, and we believe that you should always alternate between colours when decorating your pinata for maximum effect. Not only will this make your pinata more eye-catching, but it will also make it more fun to hit!
So, if you want to get really creative, try painting stripes or patterns onto your dried papier mache base before attaching decorations!

6. Filling Your Piñata
The penultimate step in creating your very own piñata is filling it up with goodies and treats. This is where the real fun begins!
To fill your piñata, insert the candy or surprises you’ve chosen through the door, making sure to distribute them evenly to avoid any disappointment. If you have larger items, make sure they are well-secured and won’t slide around during play. After filling your piñata, secure the door shut with some tape. Ensure that the tape is strong enough to keep the door securely closed but not too strong that it will damage the structure of your piñata.
Now that your piñata is fully loaded, it’s time to hang it up and watch as guests take turns bashing it open at your next party or celebration. Make sure you’re ready with a camera to capture the moment of joy and excitement. Fun (and mess) is guaranteed, and your colourful and vibrant piñata is sure to be the star of the show!
7. Hanging Your Piñata
The final step in creating your very own piñata is hanging it up. To do this, cut a piece of string or yarn that’s long enough to hang your piñata from the ceiling without touching the ground. Tie each end of the string around opposite sides of the door you cut earlier. Ensure the knots are tight enough to hold the weight of the piñata without coming loose. Test the strength of the knots by giving the piñata a gentle tug before hanging it up.
Once you’re confident that the knots are secure, it’s time to hang your piñata from the ceiling. Choose a sturdy location that is central to the party area, so everyone can get a chance to take a swing at it. Make sure there is enough space for people to move around freely and avoid hitting each other.
Finally, stand back and admire your handiwork! Your colourful and vibrant piñata is sure to be the highlight of the party and provide hours of fun and entertainment for everyone.
Exploring the Different Types of Piñatas: Hit, Pull String, and Water Piñatas
However, there are many types of piñatas including:
- Hit piñatas- Essentially, what you’ve made and hit piñatas are great for younger kids as they can take turns hitting it in order to break them open the piñata.
- Pull string piñatas- These are a great alternative for younger kids who may not be strong enough to break open a traditional piñata.
- Water piñatas- These are simply filled with water and guests take turns throwing a ball at it to burst the balloon inside.
In regards to running a hit piñata event at your party, you’ll want your kids to line up a safe distance away from the piñata. Then give each kid a turn to hit it – we suggest 3-5 strikes – in order to try and break it open. Make sure you have a parent or guardian supervising the event so that no one gets too rowdy and everyone takes turns hitting the piñata. Once the piñata is broken open, make sure to clean up any candy that’s scattered on the ground so that no one slips on it and gets hurt. And there you have it! A fun and safe way to enjoy a classic party game.
Whack Open the Fun: Learn How to Make a Paper Mache Piñata
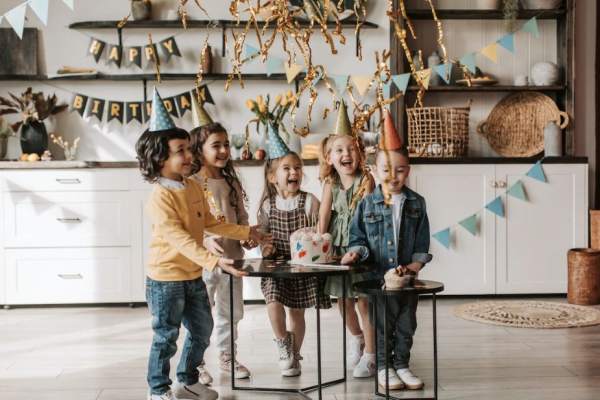
Piñatas are a beloved tradition at birthday parties, and there are nearly as many different designs and shapes to choose from as there are birthday cake flavours. Some of the most popular piñata designs include llamas, unicorns, and dragons. Of course, there are also plenty of traditional piñata shapes, such as stars, hearts, and flowers. No matter what shape or design you choose, be sure to fill your piñata with plenty of candy and toys for the guests to enjoy. And don’t forget the blindfold!
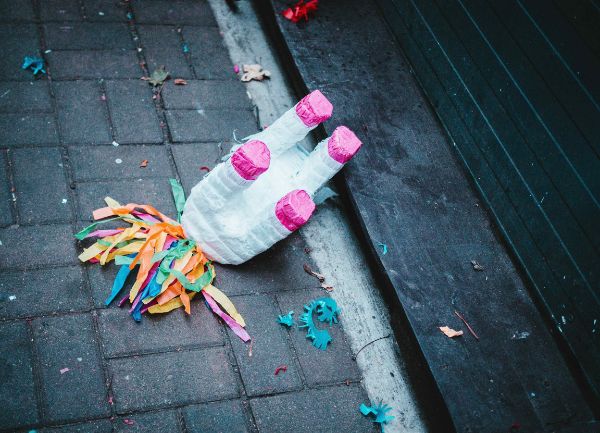
Making Your Own Paper Mache Piñata There’s nothing quite like whacking open a homemade piñata filled with candy and enjoying a flurry of confetti—especially when you made that very same piñata yourself! With this step-by-step guide, now you can create an unforgettable addition to any party or celebration without even having to leave home (or get too messy). So what are you waiting for? Grab some supplies and give it a try!
Related Posts
Make a Memorable Daytime Bash for Kids: A Step-by-Step Birthday Timeline
Are you looking for ideas on how to throw a memorable and fun birthday bash for your kids? Well, look no further! We’ve got the perfect plan for…

11 Birthday Party Hire Trends to Elevate Your Kid's Birthday Celebration
Are you looking for fresh ideas to take your kid's birthday party to the next level? Look no further! The world of birthday party hire is full of…
![How to Plan the Perfect Kids Birthday Party in 7 Steps [INFOGRAPHIC]](https://projectparty.com.au/wp-content/uploads/2022/10/how-to-plan-the-perfect-kids-birthday-party-in-7-steps-infographic-uai-600x400.jpg)
How to Plan the Perfect Kids Birthday Party in 7 Steps [INFOGRAPHIC]
Birthdays are a joyous occasion to celebrate the life of your child and share special moments with friends and family. When it comes to planning the…